+++
title = "BC-Zero - Board Testing"
summary = "From an old mining board to a console and AI server"
date = "2026-11-08"
tags = ["BC-250", "PS5", "Unlock", "BIOS", "CPU", "GPU"]
categories = ["Projects"]
series = ["BC-Zero"]
series_order = 1
+++
On February 5th, [Soffio](https://t.me/Soffioo), a friend and fellow
[LUGMan](https://lugman.org/) member, made me discover a peculiar board: the
**BC-250**.
The BC-250 is a board that comes from an [ASRock cryptocurrency mining
rig](https://www.tomshardware.com/news/twelve-ps5-apus-power-asrocks-new-cryptomining-rig),
which housed twelve of them.
Inside each of these boards there's a *binned* chip derived from the AMD APU of
the PlayStation 5, with 6 of the 8 CPU cores and 24 of the 36 GPU CUs enabled,
along with 16GB of GDDR6 RAM **unified** between CPU and GPU, an M.2 slot (PCIe
2.0x2 or SATA III), and just a few ports: two USB 2.0, two USB 3.0, one Gigabit
Ethernet, and one DisplayPort. Power is supplied through an 8-pin PCIe
connector.
At first I wasn't really convinced, especially seeing a third of the CUs cut off
and knowing that it's a board with a custom, partially locked chip (on top of
the locked cores, some features like video encoding/decoding are missing),
coming from cryptocurrency mining and with no support or community behind it.
But the price was definitely interesting, and apparently this board has a very
active community that works hard to squeeze 100% of its potential out of it on
Linux.

Things changed when, on the morning of May 30th, I got this message:

And good old Soffio also pointed out that the AliExpress sales were about to
start. Intrigued by the whole thing, I asked him if he could lend me his board
for a few days, just to try it out and see what could be done.
And *oh boy*, did this board convince me.
## Step 0: Preparation
One downside of the BC-250 is that it's not exactly *plug-and-play*. At the very
least, you need to:
1. Find a power supply that can ***really*** deliver at least 300W on the +12V
rail, with cables that can handle all those amperes;
2. Have a monitor with DisplayPort (or buy an adapter);
3. Find a way to cool the damn thing;
4. Flash the BIOS.
My test setup was:
1. The first "*el cheapo*" power supply I could find lying around (which "will
surely be fine, it says 500W");
2. A passive DP ➜ HDMI adapter;
3. A portable air conditioner for cooling (it was summer and it was starting to
get hot);
4. A CH341 SPI programmer (which I already had).
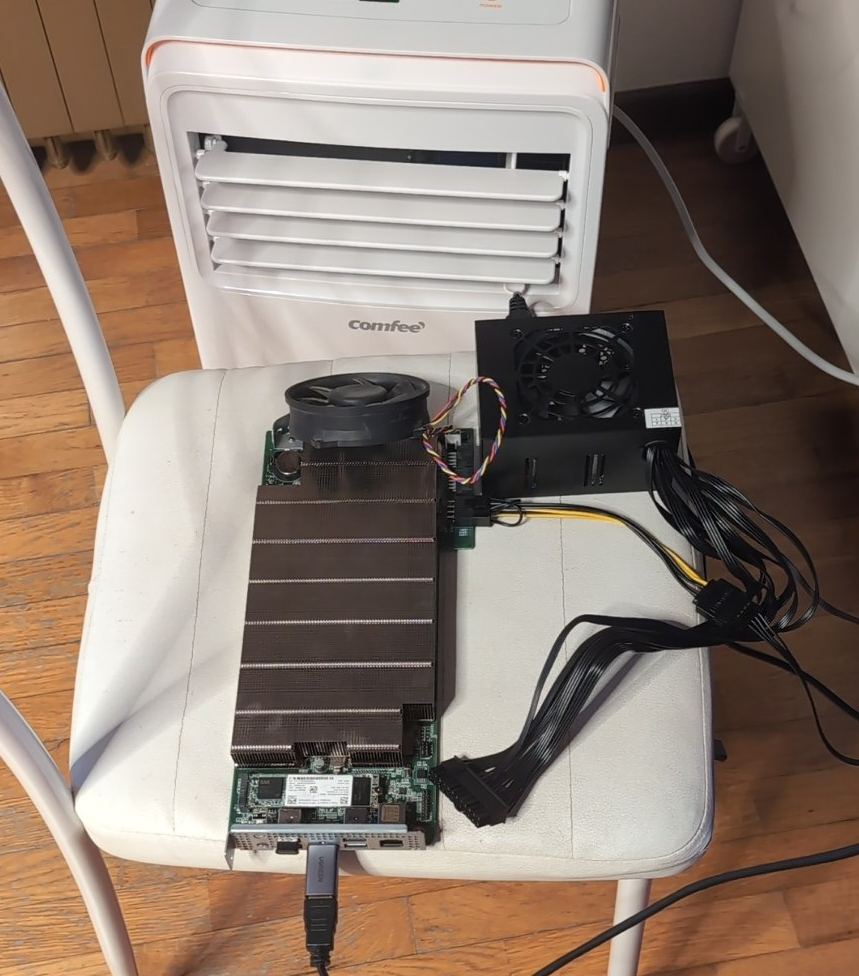
Not exactly the best setup for testing the board, but you work with what you
have.
## Step 1: Flashing the BIOS
The [first step in the community
documentation](https://elektricm.github.io/amd-bc250-docs/getting-started/quick-start/#step-1-bios-flash-critical)
is flashing the BIOS. Without a custom BIOS you don't get essential features
like dynamic VRAM allocation (remember, the 16GB of RAM are shared) and proper
fan control.
At first I installed the one recommended by the guide, the one by
[TuxThePenguin0](https://gitlab.com/TuxThePenguin0/bc250-bios), but later on I
discovered another BIOS, the one by [Forbidden
Darkness](https://github.com/Forbidden-Darkness/AMD-BC-250-UEFI-v2.2-Firmware-Menu-Script),
which, on top of unlocking the dynamic allocation menu, offers a selection of
custom splash images and, most importantly, **unlocks all 8 CPU cores**.
"*Wait, weren't they locked down?*" Apparently not enough.
The APU has all cores on the silicon, they're just disabled via firmware. A
similar principle also applies to the GPU CUs, but we'll get to that later.
---
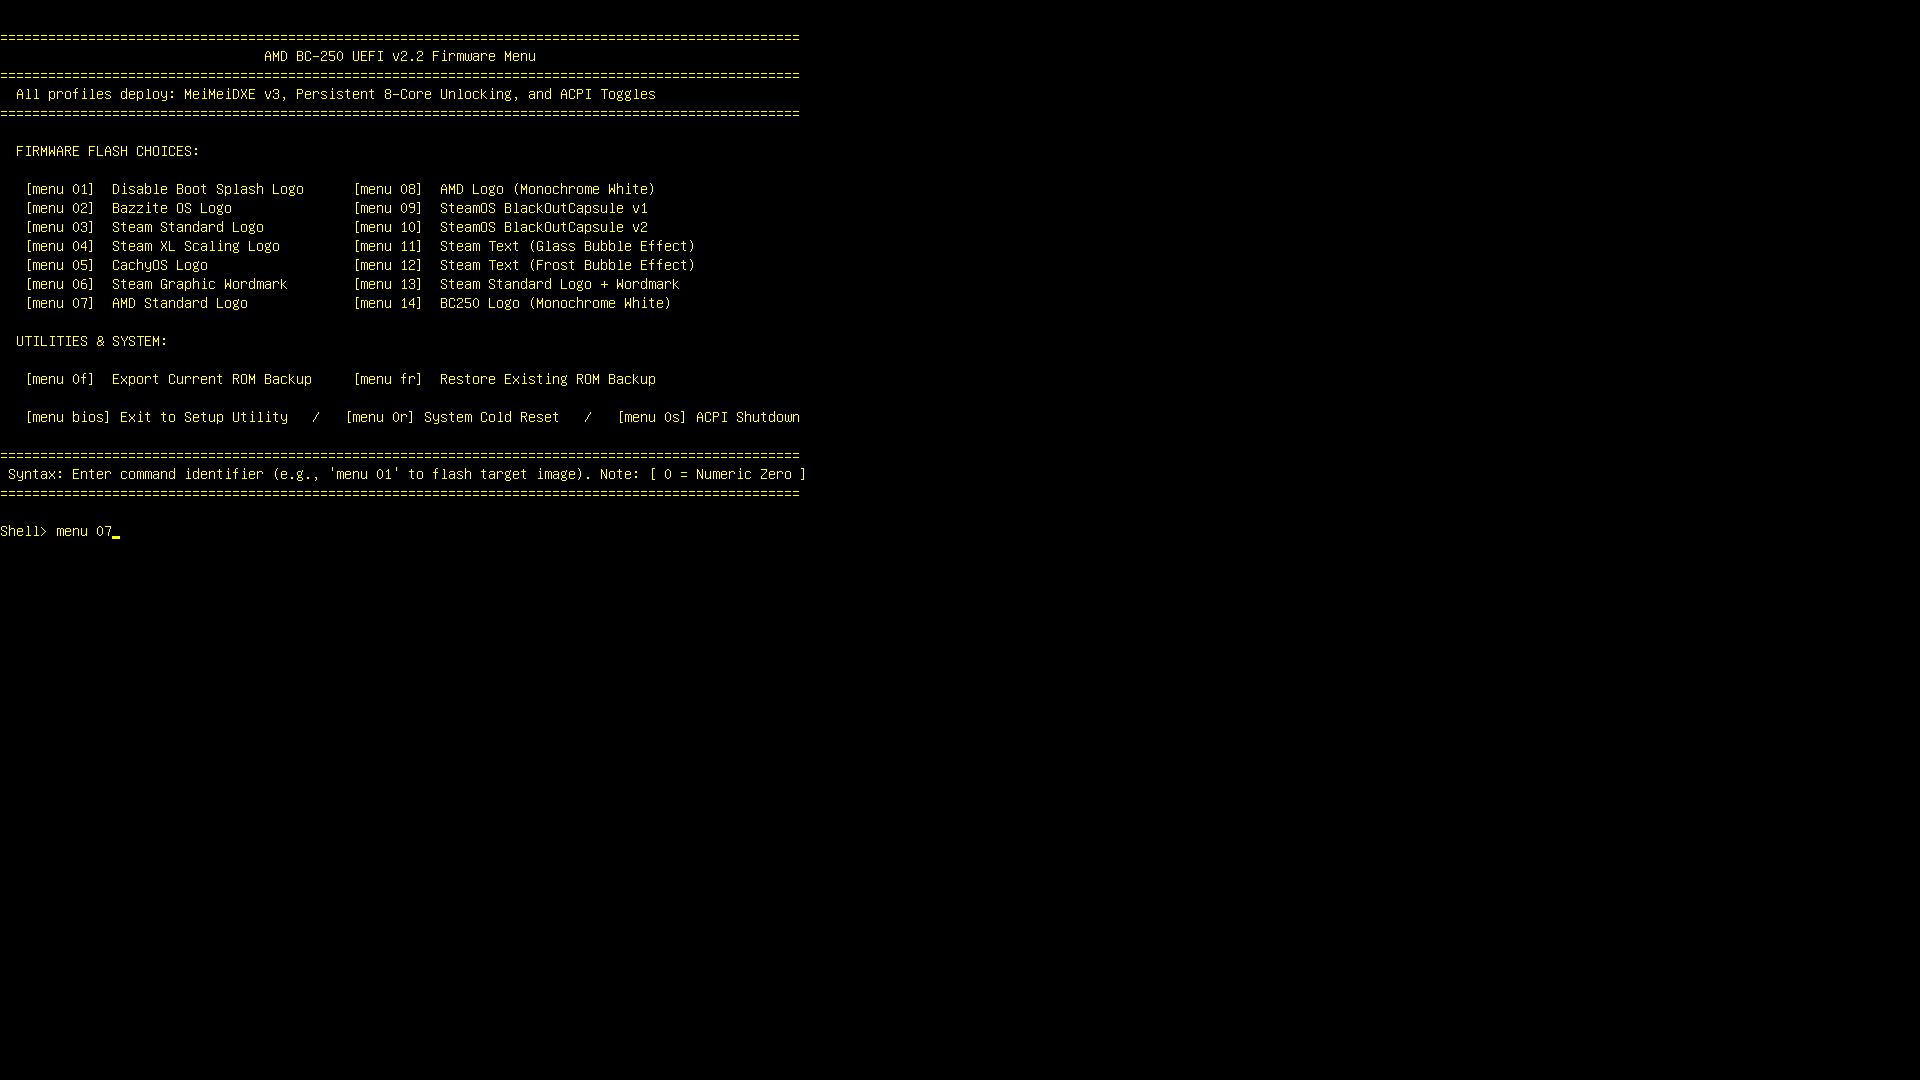
The installation is even simpler and doesn't require a BIOS flasher: just copy
the files from the `.7z` archive in the releases to a USB stick formatted in
FAT32 and boot from it. The installer asks which splash image we want (the
[`07`](https://github.com/user-attachments/assets/ca23ce6c-08ab-4293-9a70-0e55f66dc93c)
is the best one, *imho*) and proceeds with the flashing.
{{< alert icon="triangle-exclamation" cardColor="#e6d237" iconColor="#1d3557"
textColor="#1d3557" >}}
Flashing the BIOS is a dangerous operation. Make sure the board doesn't turn
off.
{{< /alert >}}
Once the flashing is done, you need to reset all the BIOS settings. To do that,
just unplug the power and bridge pin 2 and 3 of the `CLRCMOS1` header for a few
seconds. Once that's done, we can put the header back on pins 1 and 2 and plug
the power back in. By entering the BIOS with the `Del` key at boot we'll see a
lot more options.

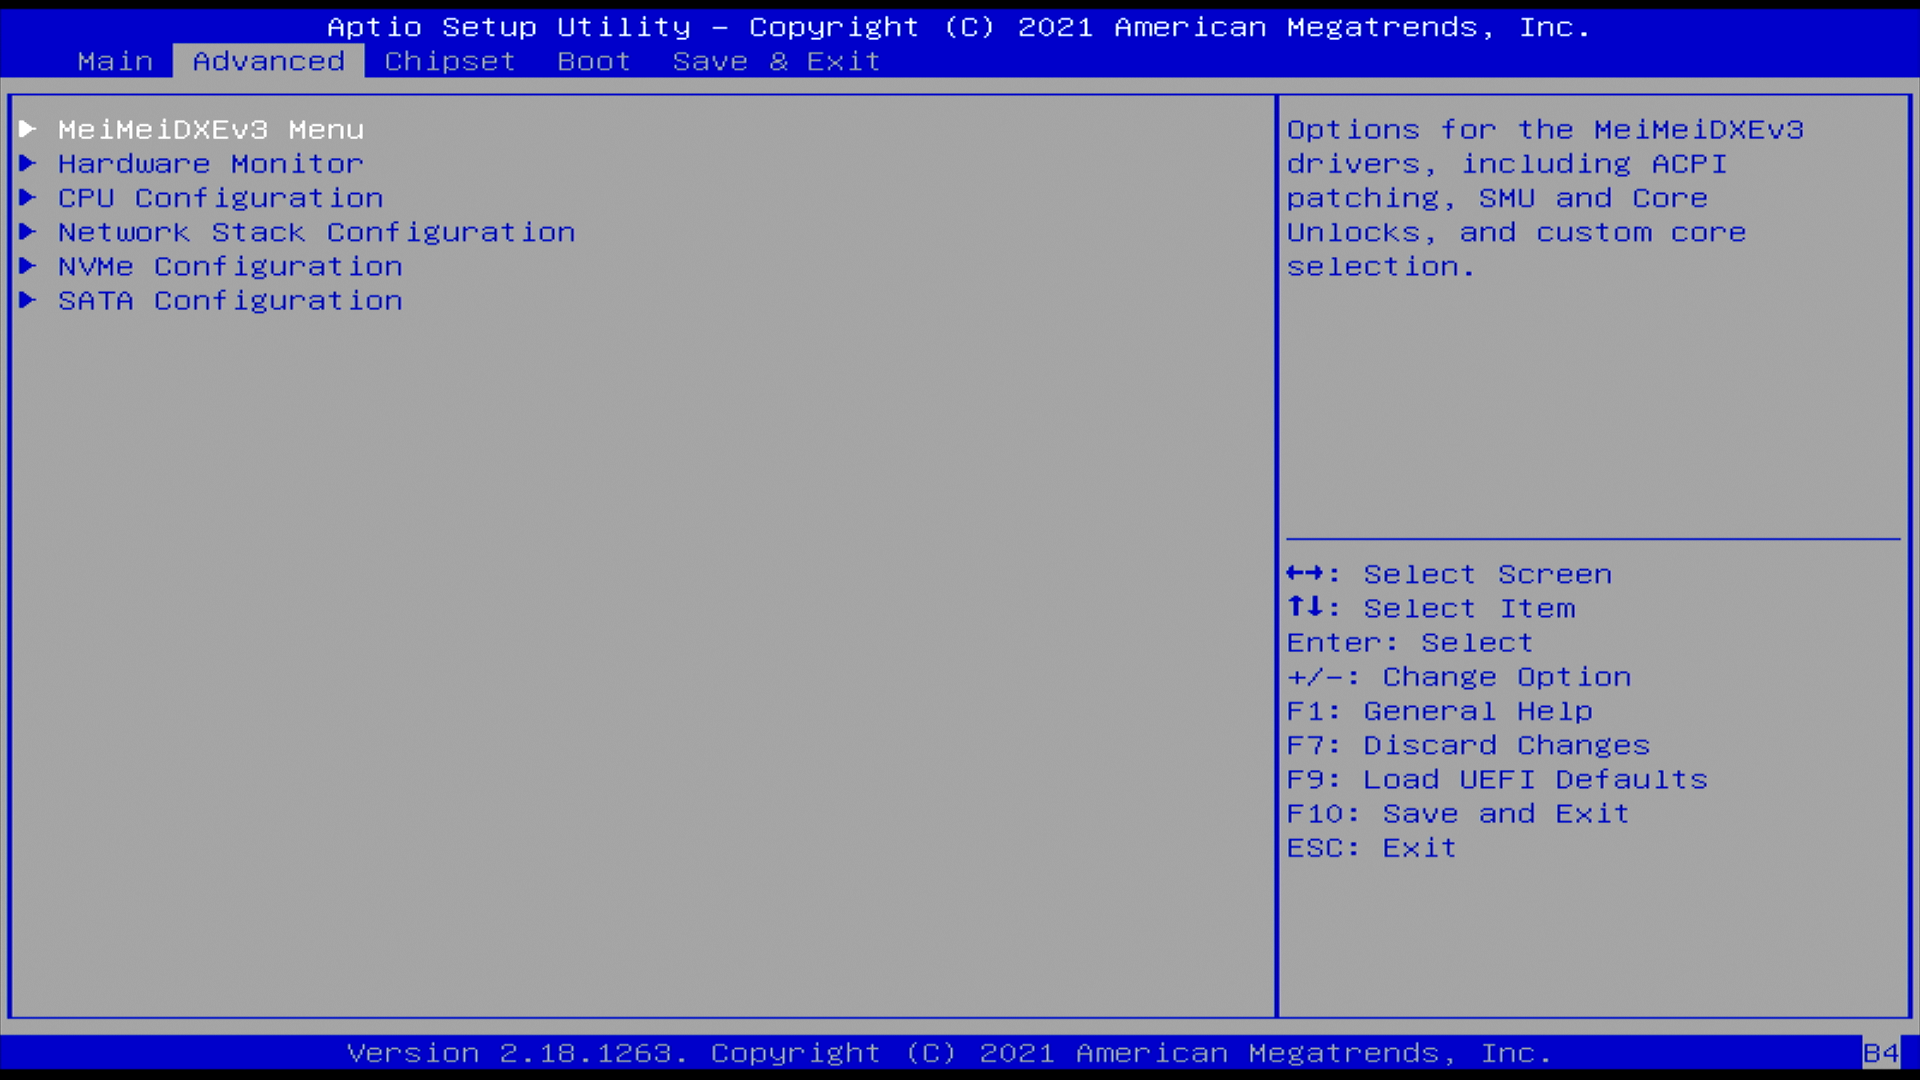
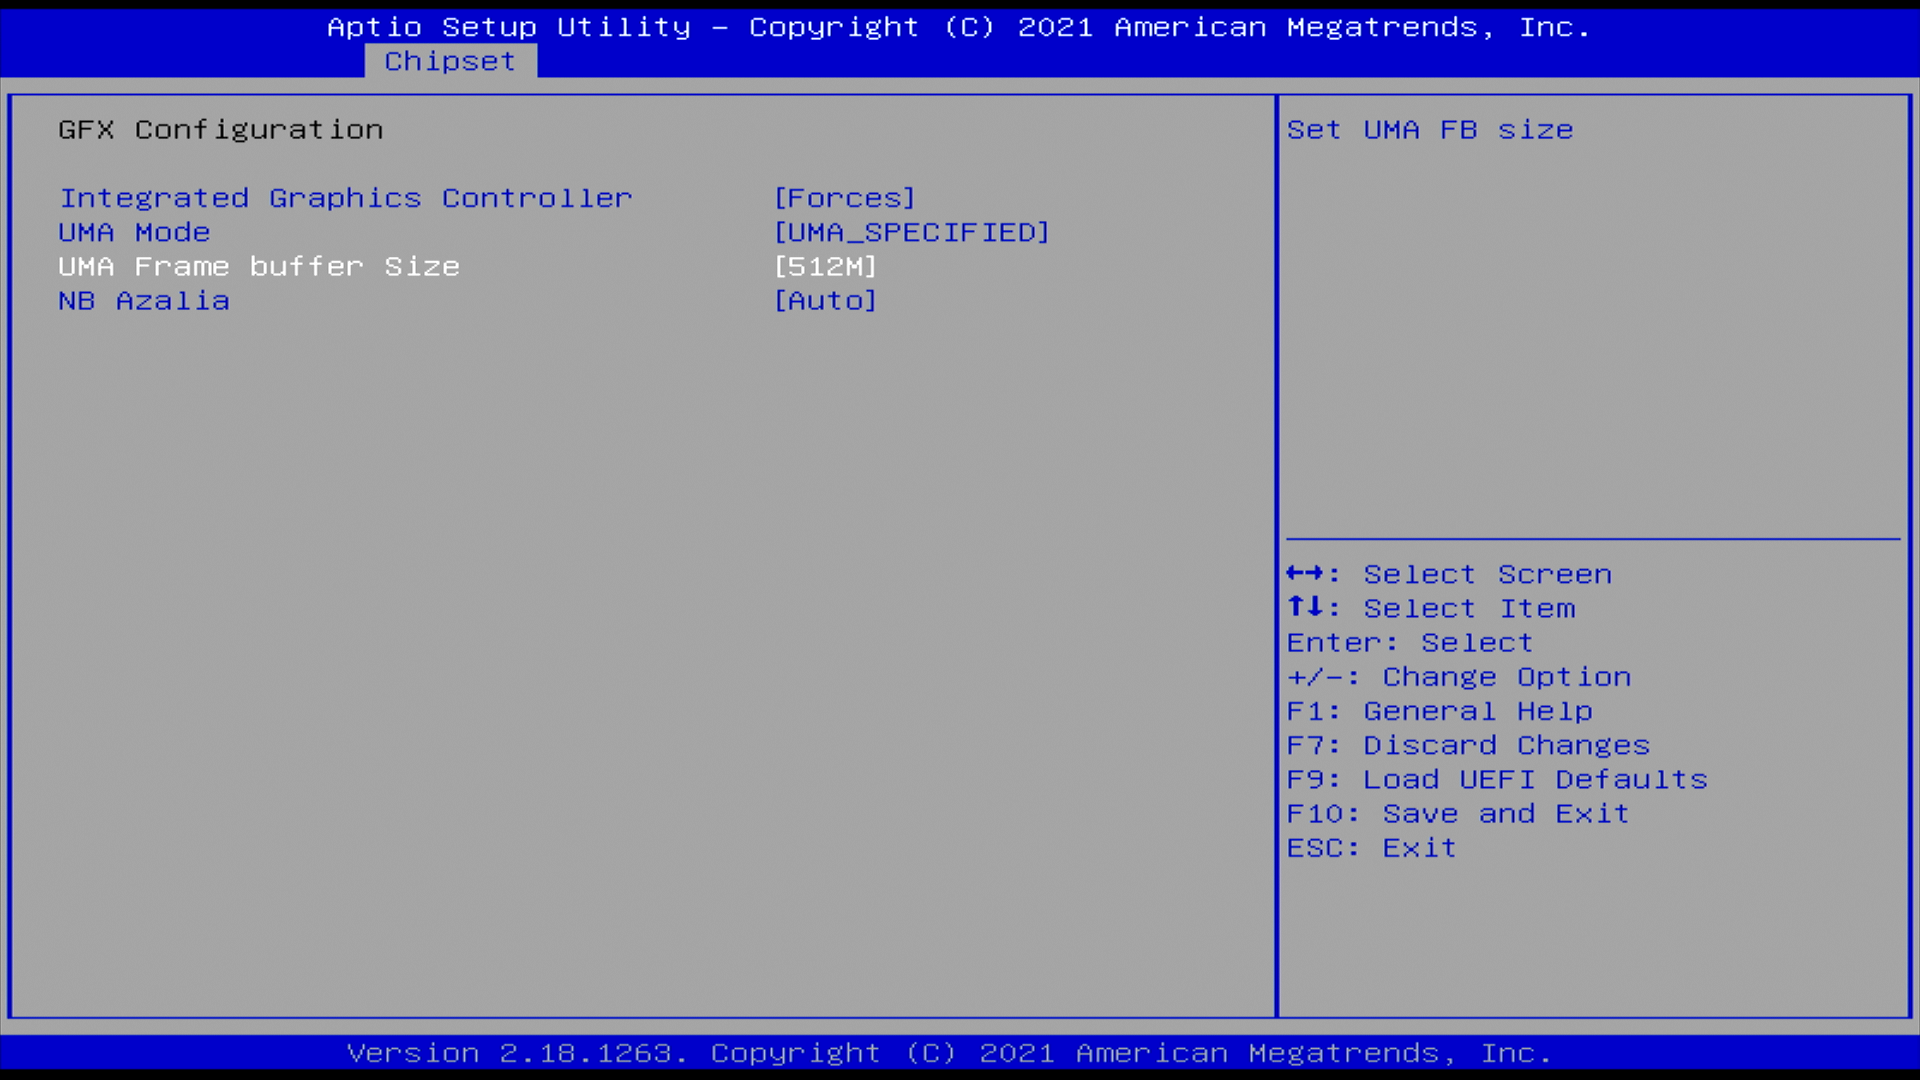
First, let's make the VRAM allocation automatic. To do that, we need to go to
`Chipset` > `GFX Configuration` > `GFX Configuration` and set `Integrated
Graphics Controller` to `Forces`, then `UMA Mode` to `UMA_SPECIFIED`, and
finally `UMA Frame buffer size` to `512M`.
Then in `NB Configuration` disable the IOMMU (it doesn't seem to work on this
board).
Finally, we enable all the cores by going to `Advanced` > `MeiMeiDXEv3 Menu` and
enabling everything.

{{< alert icon="triangle-exclamation" cardColor="#e6d237" iconColor="#1d3557"
textColor="#1d3557" >}}
There's no guarantee that all the cores will work. Damaged cores could cause
sudden crashes.
To avoid that, we'll run a stress test on all the cores and check that no
`Machine Check Exception` shows up in the kernel logs before enabling this
setting in production.
{{< /alert >}}
Once the BIOS is properly configured, we're ready to install an operating system
and test this board for real.
## Step 2: Installing a OS for testing
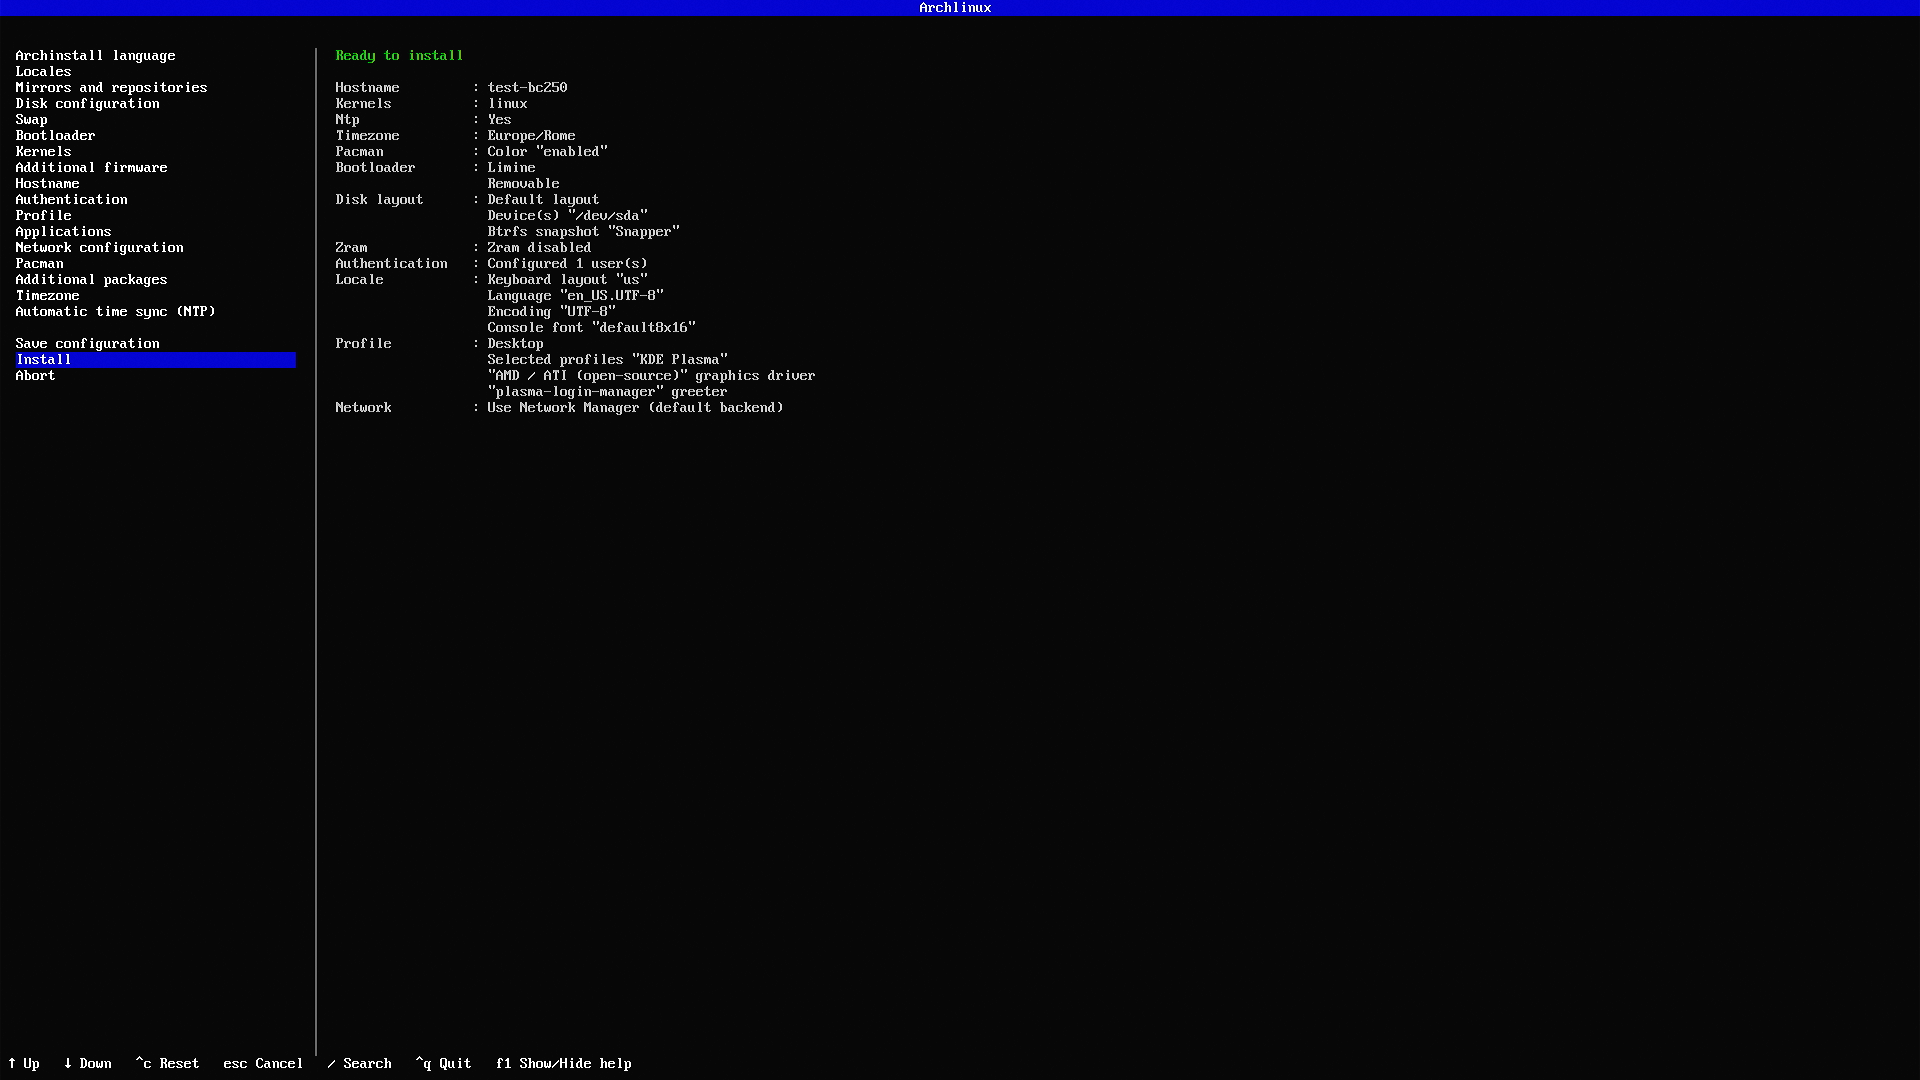
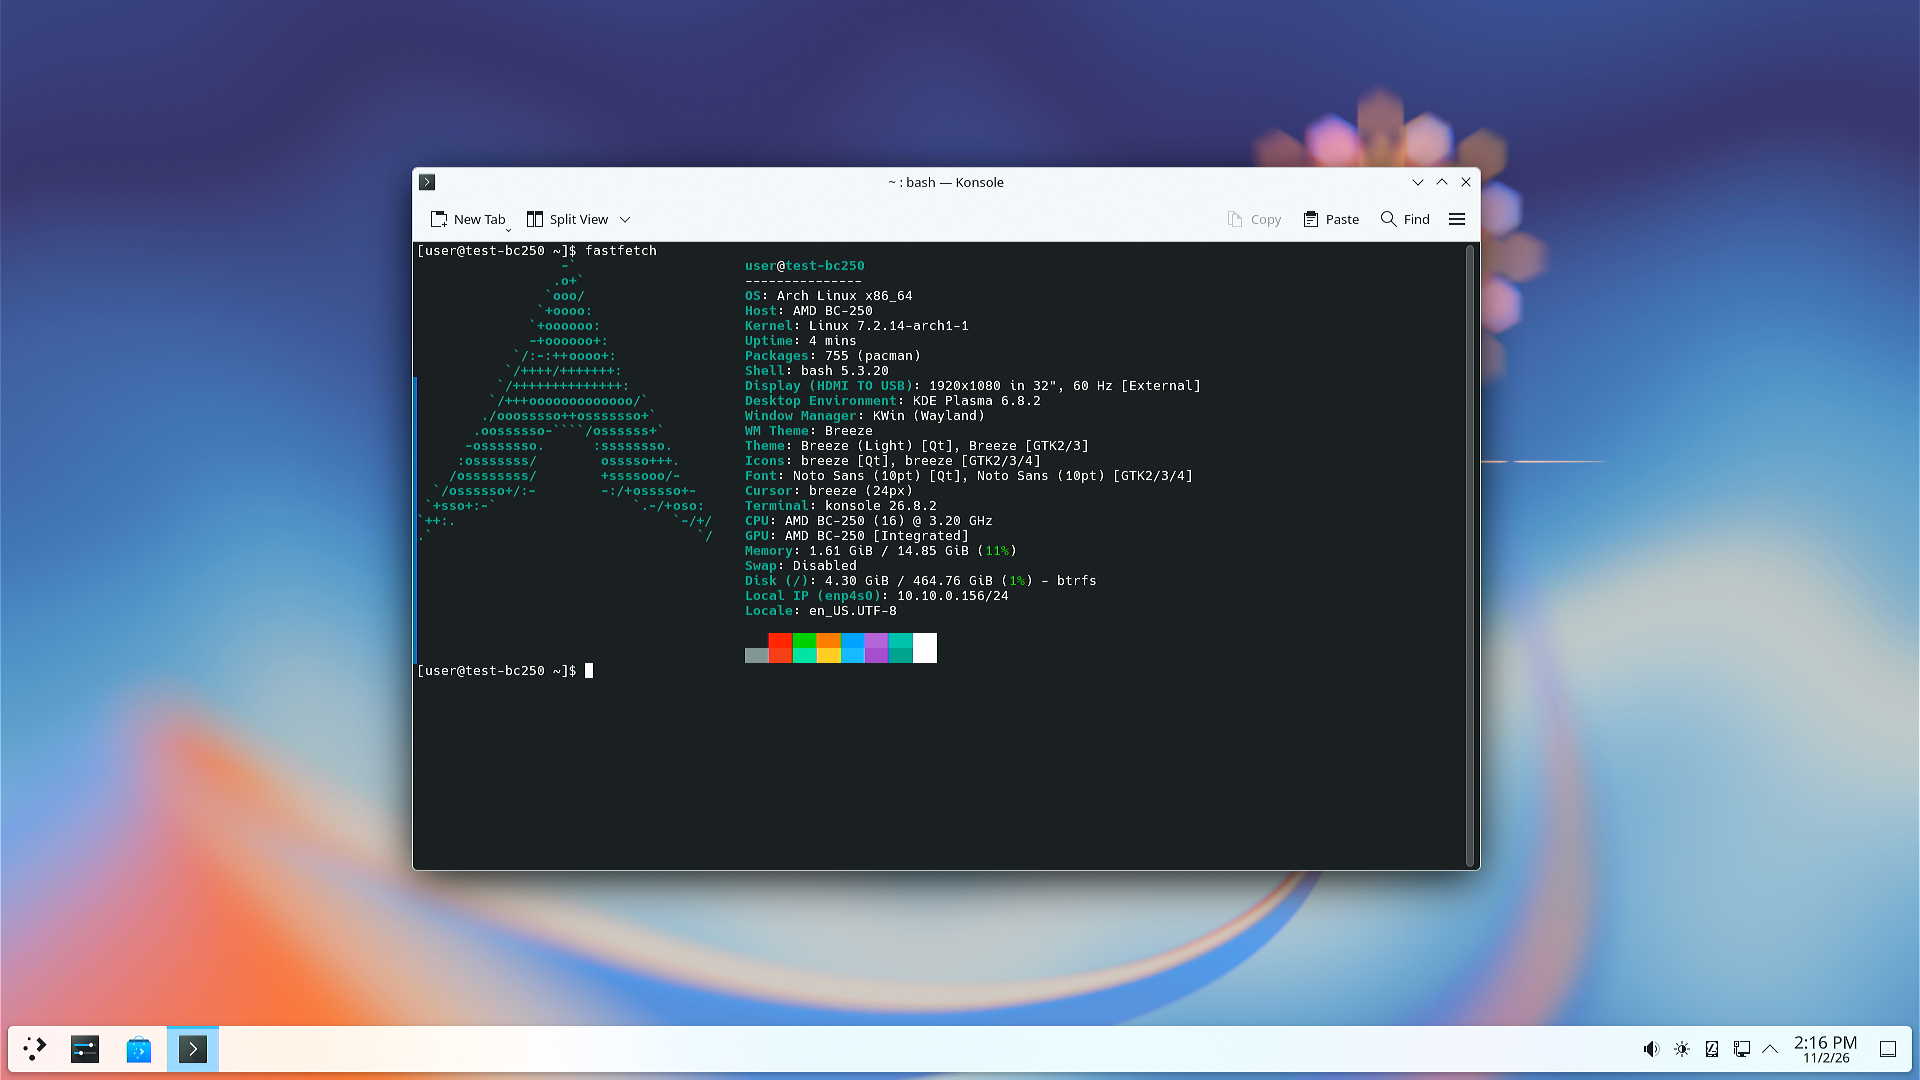
To do some CPU stress testing and run some tests on the GPU, I'll install Arch
Linux.
It won't be the final distro I'll install, but the choice isn't random:
development for this board is bleeding-edge, and for now almost all the scripts
assume you're running Arch or Fedora, so you have the latest package versions.
### Testing the 8 cores
First of all, let's test whether all 8 cores work as they should. To do that,
install the `stress-ng` package and run a stress test:
```sh
stress-ng --cpu 16 --cpu-method all --verify --timeout 2h --metrics
```
Then we check that there were no errors with:
```sh
sudo dmesg | grep -iE "mce|machine check|hardware error"
```
If the kernel doesn't report any errors, we've just gone from 6 to 8 cores for
free. If there is an error you can change which cores to enable from the BIOS.
### Stress-testing the GPU
Next, let's stress test the GPU to get a performance baseline before installing
the governor or enabling all the CUs. To do that, I installed Furmark and ran
the 1080p test.
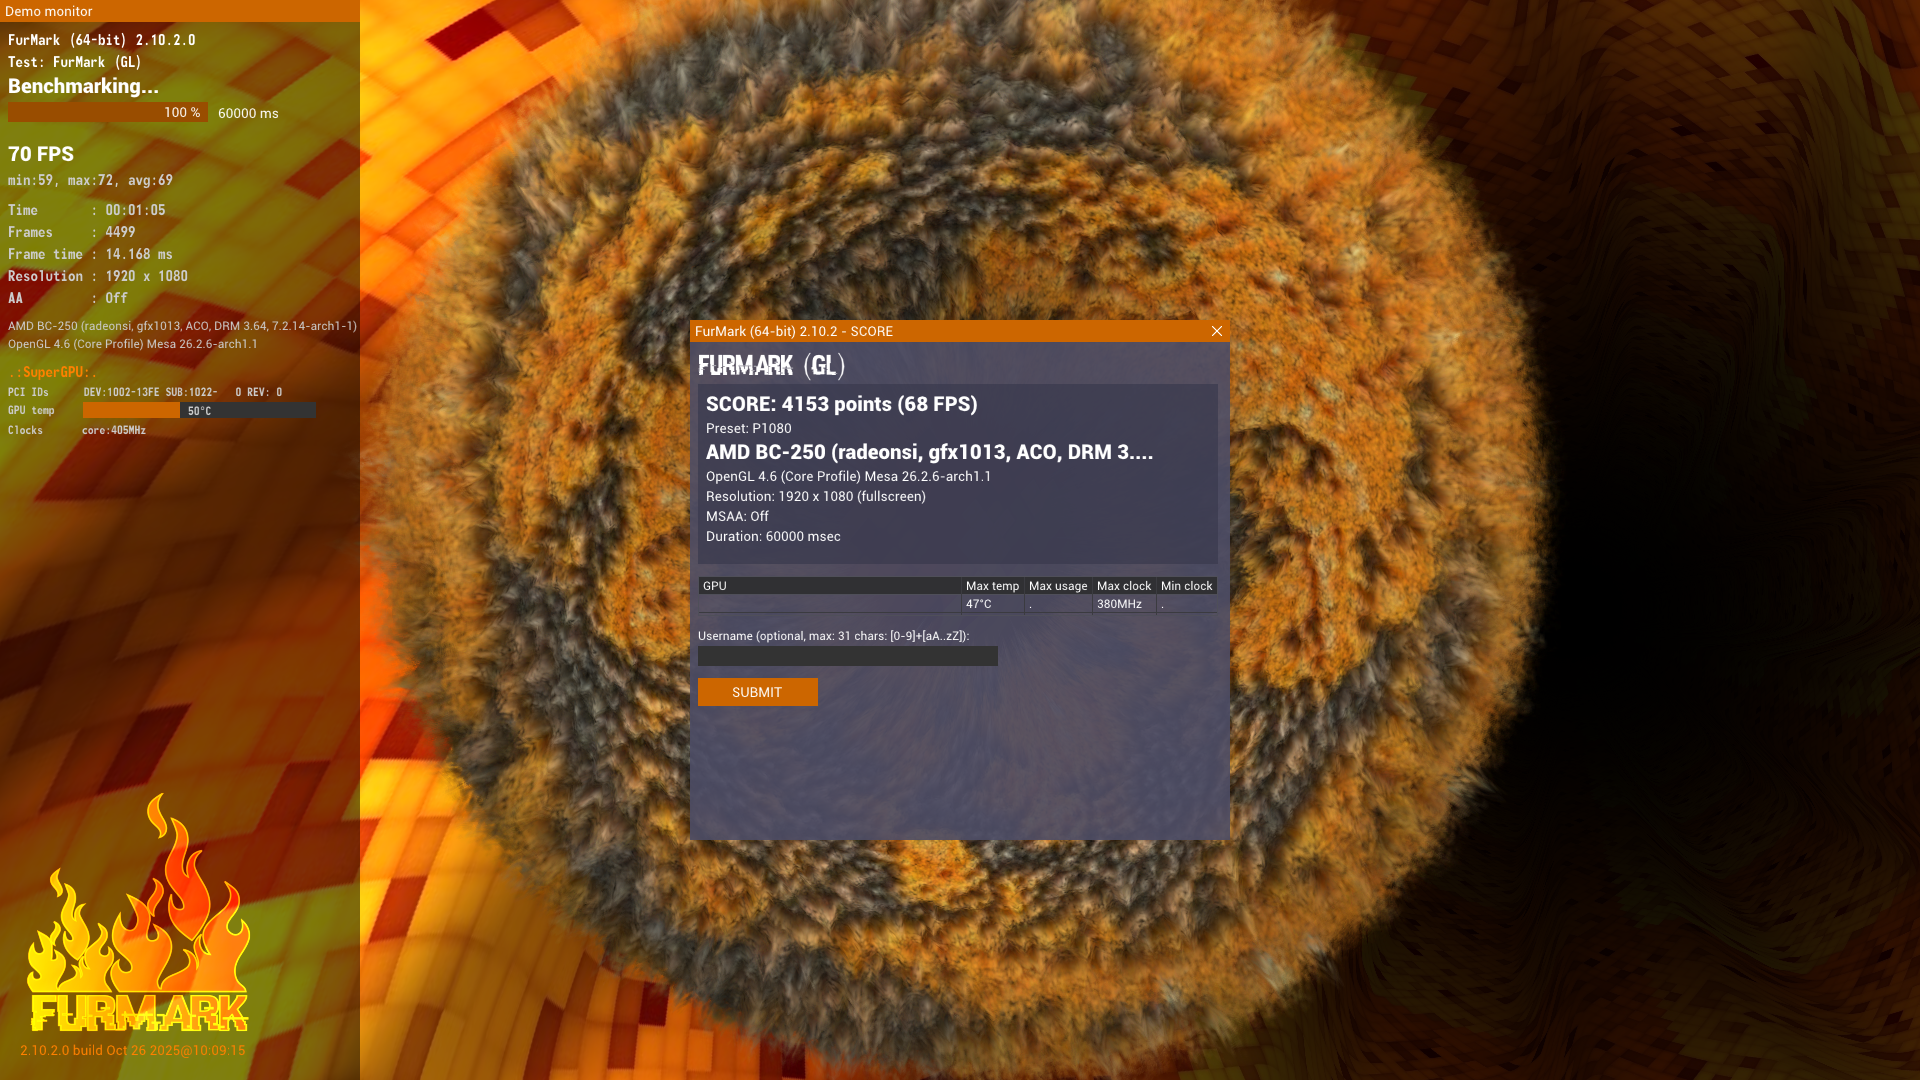
I'd say 70 FPS isn't *that* bad for the board *out-of-the-box*, but we can
definitely do better, much better.
---
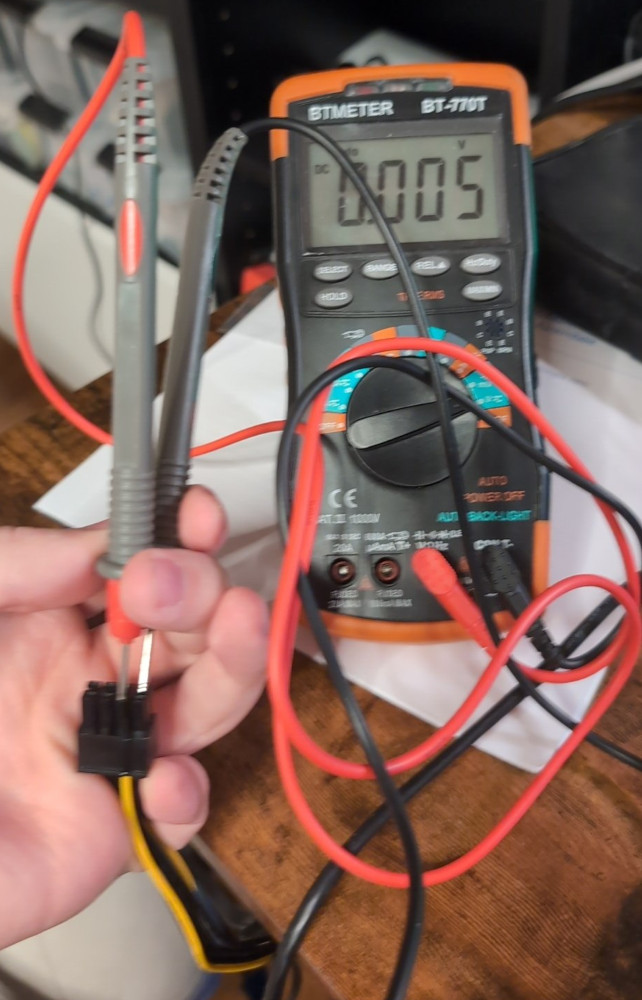
A small note I feel I should add: if during the stress test the screen goes
black and the board doesn't respond in any way, check your power supply. The
little foreshadowing I did in step 0 about the power supply is because during my
tests I ran Ollama and completely fried the PSU since (apparently) it couldn't
really handle the whole load on the +12V rail. I then bought the PSU recommended
by the community on AliExpress, along with the board, the [Metalfish 500W
FlexATX](https://elektricm.github.io/amd-bc250-docs/hardware/power#option-2-flexatx-psu-500w),
and I haven't had any problems since.
### Installing the GPU Governor
By default the GPU always runs at 1500MHz: a governor lets you raise the clock
when the GPU is under load and lower it when it isn't, to save power.
We'll install `cyan-skillfish-governor-smu`, a community project that talks
directly to the board's System Management Unit. It's also already packaged in
the AUR, so to install it you just need to run:
```sh
paru -S cyan-skillfish-governor-smu
systemctl enable --now cyan-skillfish-governor-smu
```
We can check that it works with:
```
$ cat /sys/class/drm/card1/device/pp_dpm_sclk # If it doesn't work, try card0
0: 1000Mhz *
1: 1500Mhz
2: 2000Mhz
```
The first and last lines are, respectively, the minimum and maximum GPU
frequency, while the middle line can change. The asterisk marks the frequency
currently in use. An example under load:
```
$ cat /sys/class/drm/card1/device/pp_dpm_sclk
0: 1000Mhz
1: 1850Mhz *
2: 2000Mhz
```
We should see the GPU automatically use a higher frequency under load and a
lower one when idle.
---
**Small note**: unlocking the 8 cores affects how the SMU values are read. It's
a known issue and we'll fix it later on, when we'll deal with the operating
system. Without any fix, the frequency values are wrong, for example:
```
$ cat /sys/class/drm/card1/device/pp_dpm_sclk
0: 1000Mhz *
1: 4575Mhz
2: 2000Mhz
# Not a bad overclock for a chip that tops out at 2230MHz
```
With that said, let's run a stress test now, with the governor installed.
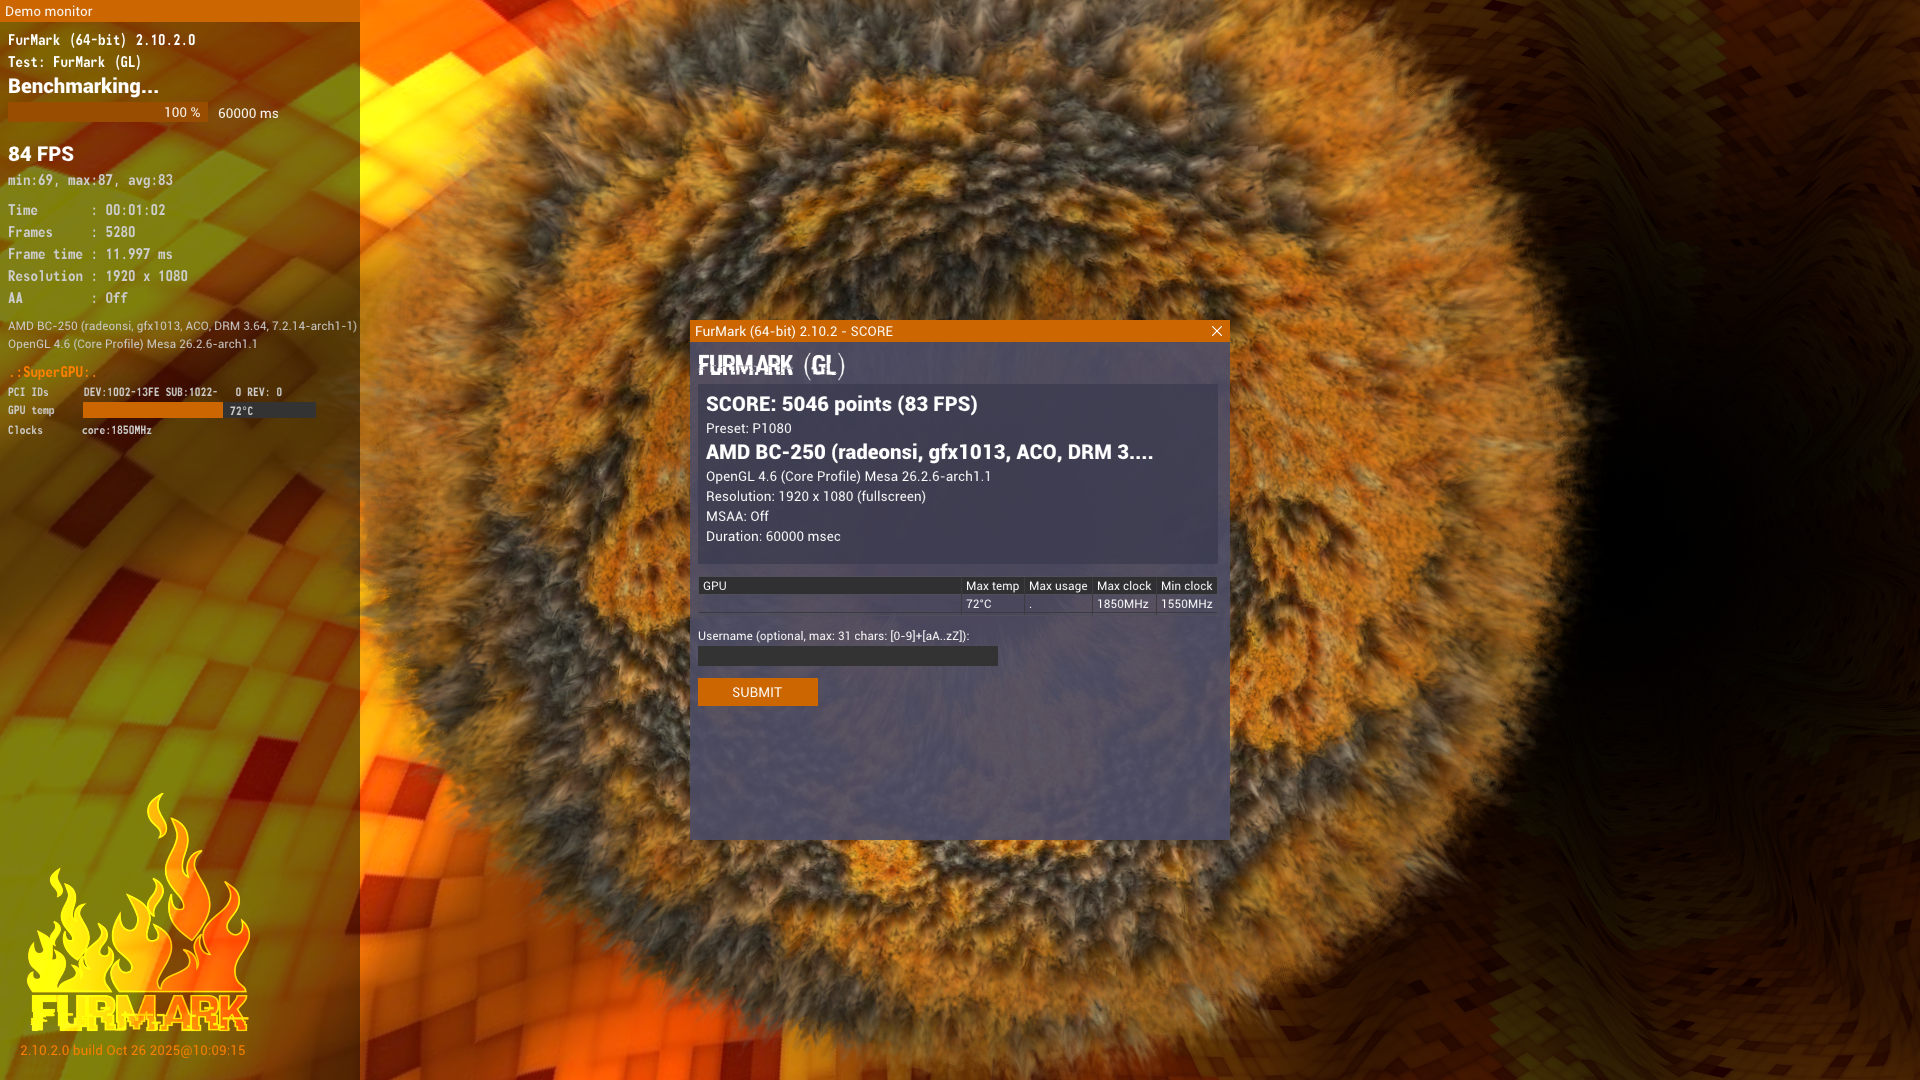
Now that we can scale up to 1850MHz, our GPU manages to reach 83 FPS at 1080p,
not bad!
1850MHz is by no means the most this chip can handle, but for now we'll settle
for it. For the curious, the frequency and voltage curves are fully customizable
and live in `/etc/cyan-skillfish-governor-smu/config.toml`. With a bit of trial
and error you can push the hardware to its limits while minimizing power draw,
but we'll do that when we set up the final operating system.
### Unlocking the 40 CUs
As we said at the beginning, this board only exposes 24 CUs to the kernel, even
though the PS5 has 36 and there are actually 40 on the silicon. We can verify
this with:
```
$ sudo dmesg | grep active_cu_number
[ 6.882856] amdgpu 0000:01:00.0: SE 2, SH per SE 2, CU per SH 10, active_cu_number 24
```
To test and then unlock all the CUs, we'll use [duggasco's
repository](https://github.com/duggasco/bc250-40cu-unlock). The mechanism is
similar to the core unlock: here too you just need to change a few values,
because the CUs aren't locked at the hardware level, they're just disabled by
the firmware.
Two registers in the GPU decide how many CUs are active. What this script does
is patch the `amdgpu` driver and write the right values into those registers
while the driver starts up, waking up the disabled CUs.
```
$ git clone https://github.com/duggasco/bc250-40cu-unlock.git
$ cd bc250-40cu-unlock/
$ sudo pacman -S linux-headers vulkan-headers
$ sudo scripts/bc250-enable-40cu-arch.sh build
# Wait for the `amdgpu` module to be recompiled
$ sudo scripts/bc250-enable-40cu-arch.sh enable
```
Once the BC-250 has rebooted, we can check that the patch worked using the same
command as before:
```
$ sudo dmesg | grep active_cu_number
[ 8.004012] amdgpu 0000:01:00.0: SE 2, SH per SE 2, CU per SH 10, active_cu_number 24
```
Apparently the script doesn't load the custom module automatically. That's not a
problem: let's regenerate the initramfs and reboot manually:
```
$ sudo mkinitcpio -P
$ reboot
# Once it has rebooted
$ sudo dmesg | grep active_cu_number
[ 8.058999] amdgpu 0000:01:00.0: SE 2, SH per SE 2, CU per SH 10, active_cu_number 40
```
Much better!
---
Once the custom module is installed, we can move on to testing the CUs:
```
$ sudo scripts/bc250-cu-health-test.sh start
```
During the test the PC will automatically reboot twenty times. Once the PC stops
rebooting on its own, we can see the test results with:
```
$ scripts/cu_map.sh
BC-250 CU Map + Health
SE0 SH0: ■■■■■■■■■■
SE0 SH1: ■■■■■■■■■■
SE1 SH0: ■■■■■■■■■■
SE1 SH1: ■■■■■■■■■■
40/40 CUs active, 0 harvested
BC-250 CU Map + Health
SE0 SH0: ■■■■■■✓✓✓✓
SE0 SH1: ■■■■■■✓✓✓✓
SE1 SH0: ■■■■■■✓✓✓✓
SE1 SH1: ■■■■■■✓✓✓✓
40/40 CUs usable (0 defective, masked)
```
Apparently I won the silicon lottery and have 8 cores and 40 working CUs.
Hurray! 🎉
If there had been any defective CUs I could have masked them using the
`bc250-cu-mask.sh` script.
---
Running the last stress test with Furmark:
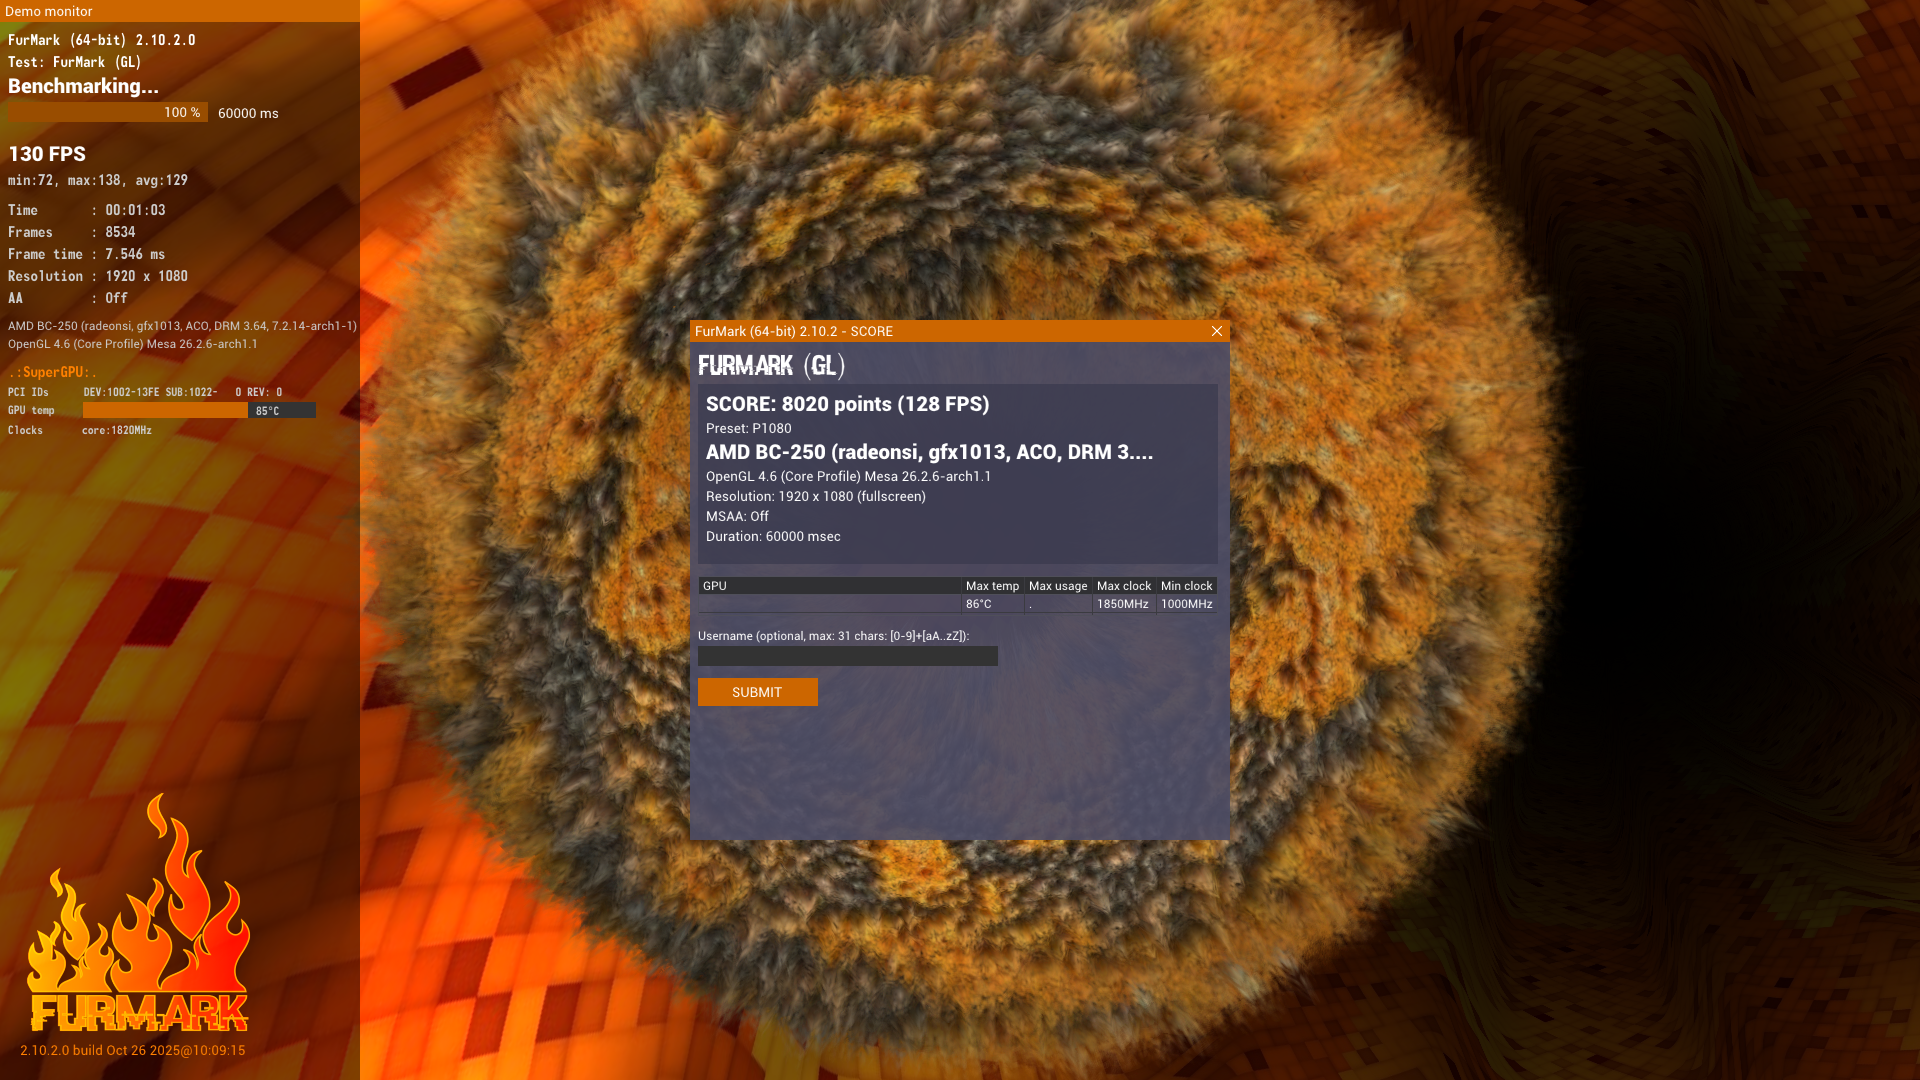
We went from the bare board, without any additional software, running at an
average of 70 FPS, to having a governor and all the CUs unlocked, with peaks of
138 FPS, twice as much!
Of course, this approach to unlocking the 40 CUs has a pretty obvious problem,
especially on rolling distributions like Arch: you have to recompile the module
every time you update the kernel. This is another problem we'll solve later on,
when we stop using a test OS, but if after an update the GPU isn't as fast as
before, it might be worth taking a look.
### Sensors and Other Essential Configurations
Once the essentials like CPU and GPU are sorted out, there are still a few small
things to take care of, such as sensor management, fans, swap, VRAM split,
etc...
I could go on about it for hours, but I'll point you to the [community
documentation](https://elektricm.github.io/amd-bc250-docs/), which is very
thorough.
What I'd like to do now is point out one thing: using the `sensors` command, we
get very little data OOTB:
```
$ sensors
amdgpu-pci-0100
Adapter: PCI adapter
vddgfx: 799.00 mV
vddnb: 799.00 mV
edge: +39.0°C
PPT: 41.41 W (avg = 40.85 W)
sclk: 1000 MHz
k10temp-pci-00c3
Adapter: PCI adapter
Tctl: +41.6°C
```
To get more data we need the `nct6683` module (read-only) or `nct6687` (you can
create custom curves with it, but it's *out of tree*). Since `nct6683` is
already available, we can enable it with:
```
$ echo 'options nct6683 force=true' | sudo tee /etc/modprobe.d/sensors.conf
$ echo 'nct6683' | sudo tee /etc/modules-load.d/99-sensors.conf
$ sudo mkinitcpio -P
$ reboot
```
After rebooting we'll see a lot more data:
```
$ sensors
k10temp-pci-00c3
Adapter: PCI adapter
Tctl: +46.9°C
amdgpu-pci-0100
Adapter: PCI adapter
vddgfx: 799.00 mV
vddnb: 799.00 mV
edge: +41.0°C
PPT: 42.61 W (avg = 40.75 W)
sclk: 1000 MHz
nct6686-isa-0a20
Adapter: ISA adapter
VIN0: 800.00 mV (min = +0.00 V, max = +0.00 V)
VIN1: 1.01 V (min = +0.00 V, max = +0.00 V)
VIN2: 992.00 mV (min = +0.00 V, max = +0.00 V)
VIN6: 1.39 V (min = +0.00 V, max = +0.00 V)
VIN7: 800.00 mV (min = +0.00 V, max = +0.00 V)
VIN16: 896.00 mV (min = +0.00 V, max = +0.00 V)
fan1: 0 RPM (min = 0 RPM)
fan2: 1709 RPM (min = 0 RPM)
fan3: 0 RPM (min = 0 RPM)
fan4: 0 RPM (min = 0 RPM)
fan5: 0 RPM (min = 0 RPM)
AMD TSI Addr 98h: +47.0°C (low = +0.0°C)
(high = +0.0°C, hyst = +0.0°C)
(crit = +0.0°C) sensor = AMD AMDSI
Thermistor 14: +37.0°C (low = +0.0°C)
(high = +0.0°C, hyst = +0.0°C)
(crit = +0.0°C) sensor = thermistor
Thermistor 15: +37.0°C (low = +0.0°C)
(high = +0.0°C, hyst = +0.0°C)
(crit = +0.0°C) sensor = thermistor
pwm1: 64%
pwm2: 64%
pwm3: 64%
pwm4: 64%
pwm5: 64%
intrusion0: OK
beep_enable: disabled
```
## Step 3: Hardware Mods
I want to remind you that for all these tests I was using Soffio's BC-250, just
to see whether it was something I'd be interested in. And since I found myself
pretty hooked I decided to get everything I needed from AliExpress.
Luckily with the sales and also using TopCashback I managed to bring home
everything I needed for less than €200. I then bought a couple of Arctic P12
Pros from Amazon.
Everything arrived on June 24th, so it was time to get to work on:
* Replacing the thermal paste and pads;
* Installing heatsinks on the back panel, to cool the GDDR6;
* Removing the metal bracket and the I/O shield (they're only needed if the
board is mounted in the rig);
* Re-running the test suite mentioned above to see if I had won the silicon
lottery a second time (luckily I did);
* Modding the heatsink.
The heatsink mod let me solve one of the problems I was having with the board:
how do I get rid of 200W of heat? So far I had the portable AC, but I couldn't
keep using a heat pump to cool a single board.
When they're in the mining rig, the BC-250 all have their heatsinks laid out
lengthwise, so a single array of fans is enough to cool all 12 boards at once.
If you want to use one of these boards on its own, you need to get a bit more
creative to get rid of the heat.
The most common solution in the community is the [heatsink
mod](https://reddit.com/r/BC250Gaming/comments/1rjc3io/), which consists of
literally cutting open the heatsink in the section above the APU to make room
for a fan.
It's a somewhat long and tedious job, but it's not impossible to do. It's also a
pretty repetitive task, so once you get the hang of it, it goes by farely
quickly. In the end all it took was a pair of scissors, some good music, and an
hour of my time.
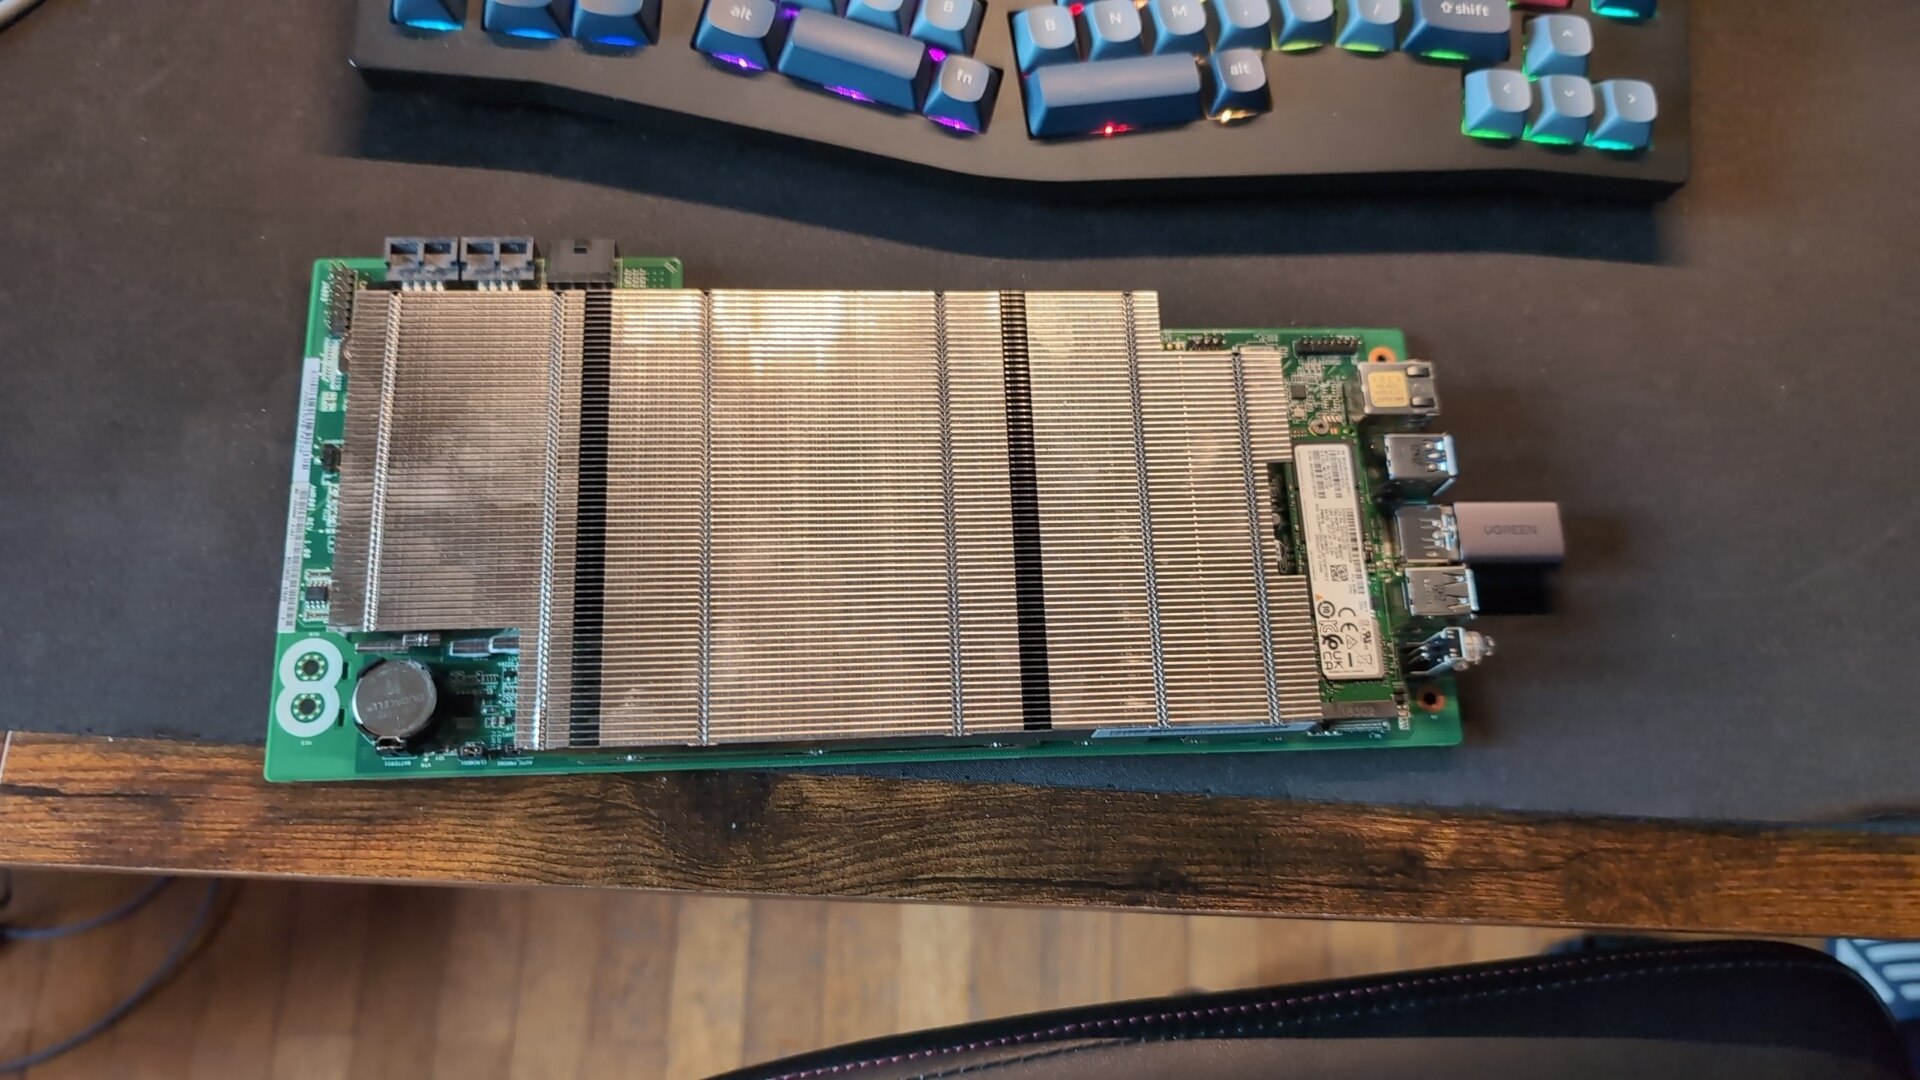
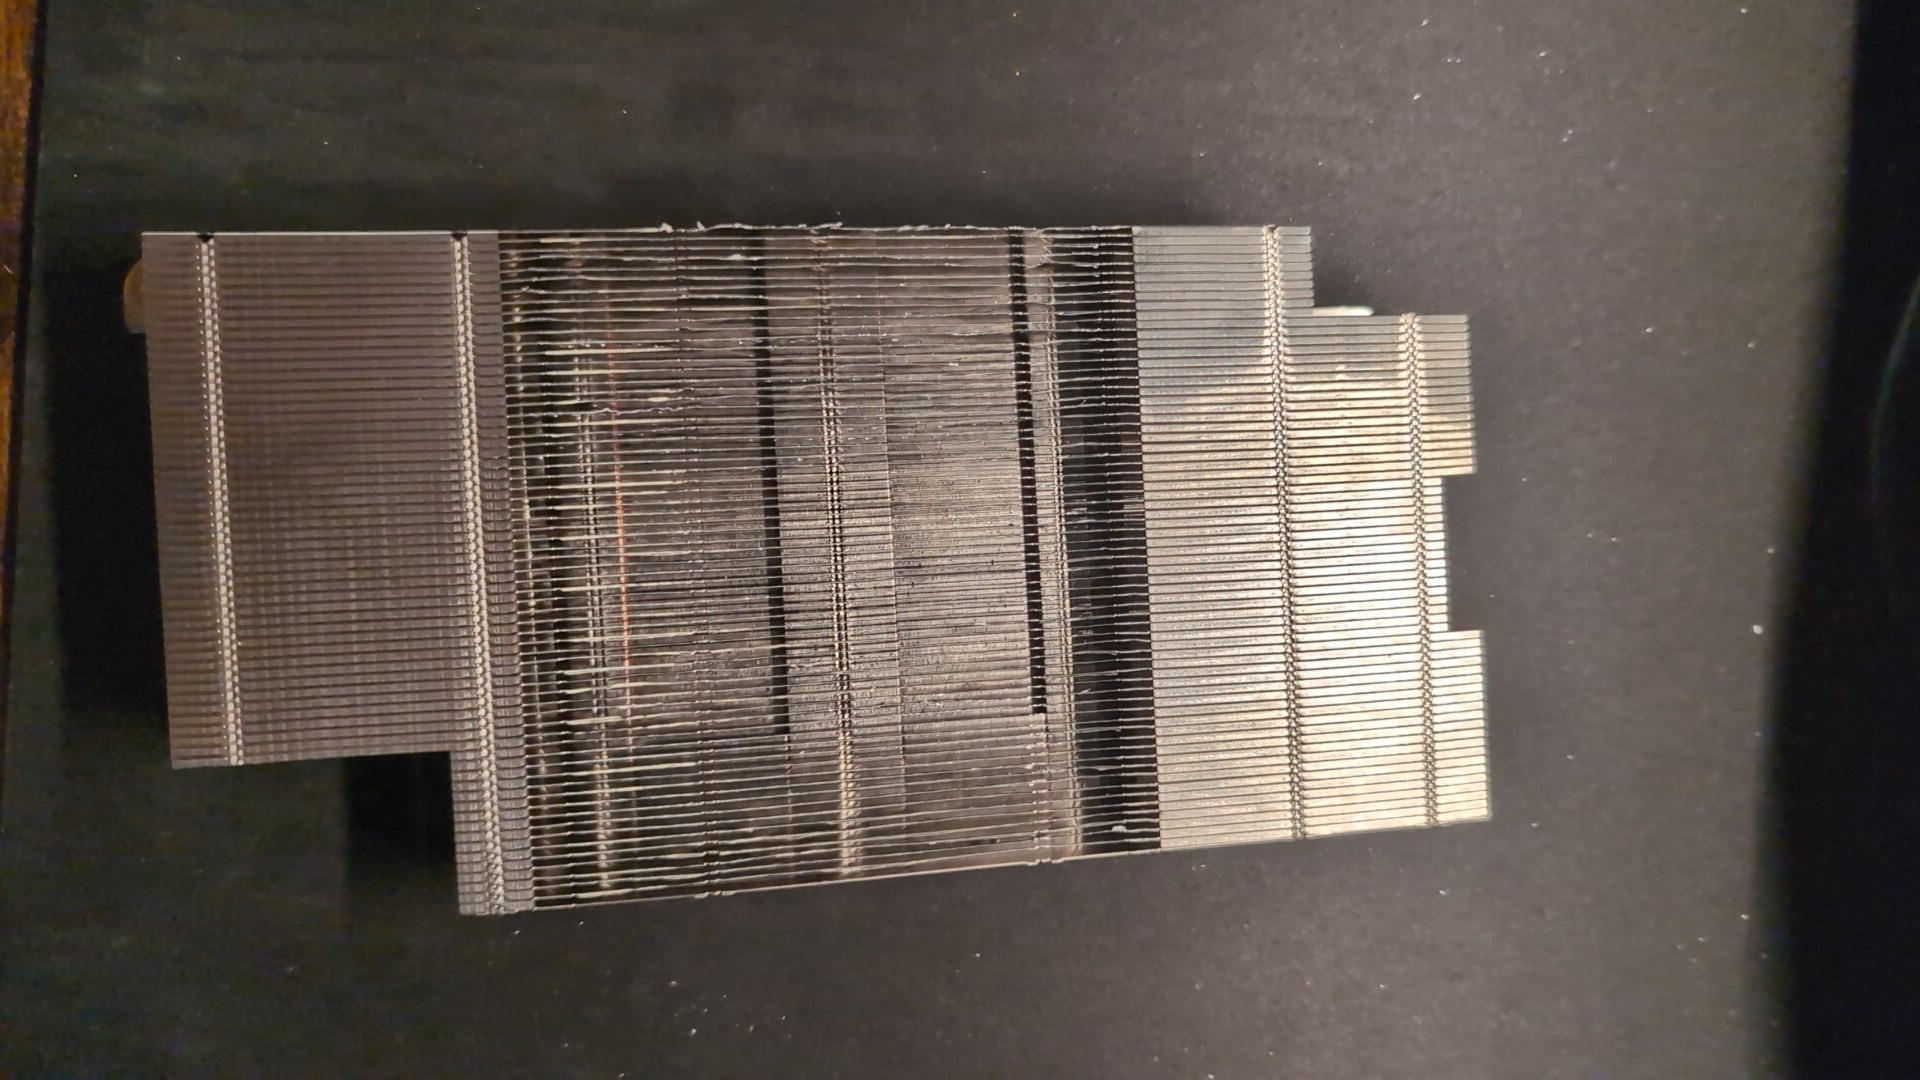
It's a bit *rough around the edges* (*literally*), but it works. And the hole is
big exactly as a 120mm fan, so one of the two fans can blow directly onto the
APU.
---
Since this article has gotten pretty long, I've decided to split it into
multiple parts. In the next one, we'll design a custom case for my needs.